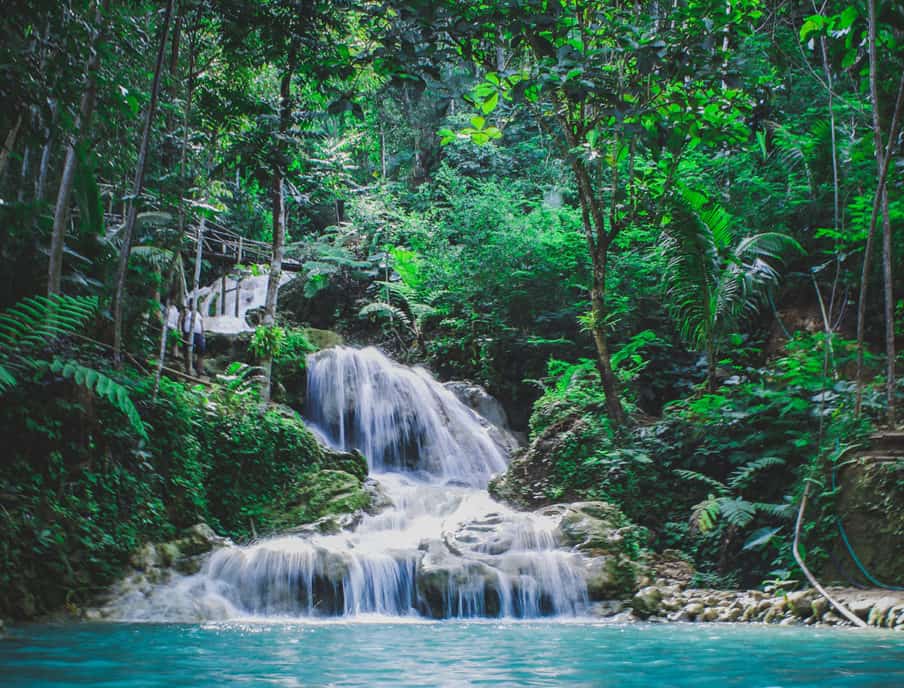

Visiting one of the many beautiful waterfalls in Costa Rica is very popular activity. They are beautiful to look and even swim near. However, when it comes to photographing a waterfall , it can be more difficult then you think.
There are many tricks on how to work your camera best to capture some award-winning waterfall photos in Costa Rica. In this article, we will discuss the best ways to photograph a waterfall in Costa Rica (or anywhere) for either a beginner photographer or enthusiast!
The specific camera you use is not essential, but it is a good idea to use one that allows you to set your shutter speed to several seconds or minutes. More importantly, it is crucial to choose a camera that can go fully manual and has a Bulb setting is a good option as well.
To create too long exposures (beyond 30-seconds), you will need a DSLR or Mirrorless camera with the ability to photograph in Bulb mode. I currently use a Nikon Z6 for my photography, which allows me to change lenses, control my exposure, and attach filters.
6 Tips On How To Photograph A Waterfall

When photographing waterfalls in Costa Rica, I tend to prefer using zoom lenses, both wide and telephoto. I use a filter (which we will cover more below) holder on the front of my lens, and because I only use a handful of lenses means that I change my lens less frequently, making it easier to swap the filters back-and-forth.
1. Use a Slow Shutter Speed
To capture that perfect “ghost-like” effect on a waterfall, you need to use an extremely slow shutter speed of several seconds or longer. Slow shutter speeds will make the subject appear smooth and blurry, which is precisely what you want. Fast shutter speeds only freeze the running water when you can see “bubbling.”
2. Use a Tripod
If you want to capture moving water and make it look smooth and elegant, you will need to use a tripod. Due to the long exposure time for many, it is impossible to handhold a camera without introducing camera shake when using extremely slow shutter speeds.
While you could set your camera on a stone or some other object, you would still be limited by how much you can move and what part of the waterfall you could capture. It will also restrict your angles based on your surroundings.
If you do not yet have a tripod, I highly recommend getting one as soon as possible. You can look on Amazon for Tripods as the price varies quite a bit. I have a MeFoto Road Trip Tripod that has worked great but you can also look at brands like Gitzo
3. Stop Down / Change Aperture to a Larger Number
Stopping down, which is another way of saying increasing the f/ number (for example, 2.8, 5.6, 8, 11, 16, 22) , decreases the amount of light that passes through the lens. If you set a high shutter speed, try changing the aperture to a larger number like f8 or perhaps even f/16, if necessary.
Changing aperture is the last thing you can try on your camera if you do not want to spend the money on a good ND filter from manufacturers like Tiffen.
4. Use The Lowest ISO
Once you set your camera on a tripod, you need to continue decreasing your shutter speed, this is called “bracketing”. Lowing the camera ISO to the smallest value, such as ISO 100, increases image quality and reduces the shutter speed.
For example, decreasing camera ISO from ISO 400 to 100 on a DSLR decreases the shutter speed by three full stops, so if you were shooting at 1/250th of a second, you would end up with a shutter speed 1/10th of a second.
5. Use Wide-angle and Telephoto Lenses
It is always good to have options when you are trying to capture the perfect photo. I suggest you take both a wide-angle and telephoto zoom lenses to photograph waterfalls. High and powerful waterfalls can release plenty of moisture into the air, which might land on the front of your lens or even potentially damage your equipment.
Use a telephoto lens such as Nikon 70-200mm f/2.8G VR II to photograph falls from a distance and a wide-angle lens such as Nikon 16-35mm f/4.0 VR if the falls are smaller and you are standing close to them.
6. Use a Neutral Density Filter
This is what we call troubleshooting. If you have already tried decreasing your camera ISO to the lowest number and you have already adjusted your aperture to the largest f/ number and you still cannot get to multiple seconds of exposure.
This means that you are most likely shooting in bright-day conditions and there is still too much light entering through the lens. The only way to decrease the amount of light going through the lens, is to use a filter in front of the lens that blocks a large portion of incoming light.
“ND” or “Neutral Density” filters are specifically designed for this purpose – to only let a small amount of light into the lens in order to decrease the camera shutter speed. There are many different types of Neutral Density filters out there and most of them differ by the amount of light they let through. You can look on Amazon for types and prices
Most ND filters have a number at the end that says something like “ND 0.3” or “ND 1.8”. These numbers represent the amount of light the filter stops. For example, an “ND 0.3” filter would block one stop of light, while an “ND 1.8” would block 6 stops of light.
Post-Processing Photos
I always suggest shooting in RAW. Because you have more control over the final image. So, open that smooth waterfall photo in your favorite image editing program and tweak the RAW file to ensure the exposure, white balance and other factors are perfect. If you’re still not happy with the level of blur in the water, the Photoshop blur tool can smooth it out a bit as well. If you don’t have Photoshop, you can get a year subscription that includes Photoshop, Lightroom and 1 TB of space.
Final Thoughts
One of my favorite things to capture is waterfalls. They are beautiful, eye-catching images, no matter how many times they are photographed. It also presents a fun challenge to photographers—smoothing out the water with a long exposure during the daytime is quite tricky, but with the right camera settings, it’s possible to take photos that make people ask, “How did you do that?”
There is no magic number to set your aperture and shutter speed to get a good long exposure water photograph. A shutter speed of a few seconds might be all you need to get the look you are after – it is all about practice. Practice makes perfect and you will learn the different weather conditions and how to work your camera accordingly.